ROBOTICS:
PROJECT-BASED LEARNING
PROJECT:
BLUETOOTH RGB LIGHTS
Design
Any string of red, green and blue LEDs can serve as the base of your design.
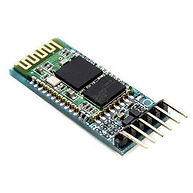
The concept is fairly straightforward, which is to utilise the Bluetooth interface of your existing mobile device to transmit and receive information from your circuit in order to control the lights. Makes a fine addition to any RGB PC Setup
For simplicity, this circuit here will be built using only a simple LED circuit as the primary purpose is to understand the use of the Bluetooth interface
WARNING:
It is important to bear in mind that larger lights with longer strings of LEDs require a higher power source which exceeds the load of the microcontroller
TAKE EXTREME PRECAUTION WHEN USING HIGHER POWER SOURCES!!
AVOID THE USE OF AC POWER (WALL SOCKETS)
What You Need


The Circuit

Created with Fritzing
The Code
int RED = 13;
int GREEN = 12;
int YELLOW = 11;
int data = 0;
void setup(){
Serial.begin(9600);
pinMode(RED, OUTPUT);
pinMode(GREEN, OUTPUT);
pinMode(YELLOW, OUTPUT);
}
void loop(){
if (Serial.avalable() > 0)[
data = Serial.read();
}
Serial.println(data);
delay(1000);
if (data = '1'){
digitalWrite(RED, HIGH);
digitalWrite(GREEN, LOW);
digitalWrite(YELLOW, LOW);
}
else if(data = '2'){
digitalWrite(GREEN, HIGH);
digitalWrite(RED, LOW);
digitalWrite(YELLOW, LOW);
}
else if(data = '3'){
digitalWrite(YELLOW, HIGH);
digitalWrite(GREEN, LOW);
digitalWrite(RED, LOW);
}
}
The App
For ease, you may download the Android version of the bluetooth control app here
No compatible iOS available currently
